
This is the nineth episode of the Cura Custom Settings series, where we are going to analyse the nineth tab of the custom settings menu in Ultimaker Cura 3.4, that is the Build Plate Adhesion.
You can support us on Patreon here
And Subscribe to our YouTube Channel here
Build Plate Adhesion
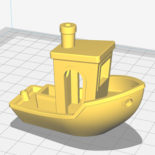
In this video we are going to use mainly the 3DBenchy file that you can download from our files repository linked down below. With it we will play with the settings and that will also help us getting the best configuration of the build plate adhesion for our 3d printer.
This configuration can vary depending on the 3D printer we are using, but we got a standard configuration that should work in most of the printers, and also explained what are each of the menus so everyone can do the specific configuration for its 3d printer.
Along the video we will experiment with a lot of options, and finally we kept activated the next ones: Build Plate Adhesion Type, Raft Extra Margin, Raft Smoothing, Raft Air Gap, Initial Layer Z Overlap, Raft Top Layers, Raft Top Layer Thickness, Raft Top Line Width, Raft Top Spacing, Raft Middle Thickness, Raft Middle Line Width, Raft Middle Spacing, Raft Base Thickness, Raft Base Line Width and Raft Line Spacing.
Tuning your build plate adhesion settings it’s necessary to properly get your prints to stick to the bed, and it will improve a lot the final quality of your prints.
You can DOWNLOAD the 3DBenchy STL FILE announced in the video from our files repository.
3D Benchy
Cura advanced settings 2018
This series is going to have 11 episodes, one dedicated for each of the Tabs in the Custom Print Settings menu in Cura 3.4. You can find the list of episodes here:
- #01 – Quality
- #02 – Shell
- #03 – Infill
- #04 – Material
- #05 – Speed
- #06 – Travel
- #07 – Cooling
- #08 – Support
- #09 – Build Plate Adhesion
- #10 – Special Modes
- #11 – Experimental
In the next episode we will analyze the tenth tab in the cura custom settings menu, Special Modes. So subscribe to the channel and activate the bell to be notified when the next video is uploaded.
About Ultimaker Cura 3.4.
Cura is one of the most common slicer software that are mostly used for 3D Printing. It supports a huge variety of 3d printers such as the BQ Hephestos, Original Prusa i3 MK2, Ultimaker 2, Ultimaker 3, Rostock, etc.
It allows us to print in 3d in three different ways:
The first is by uploading the .gcode files into an SD Card, that we will insert in our 3D Printer. Second, we can connect our 3D Printer to our computer via USB, and control it directly from our Cura software, and finally, there is an option to control some 3D Printers at the same time remotely, via internet.
Ultimaker Cura in the version 3.4, or the most recent version depending when you watch this video, is available both for Mac OS and Windows operating systems.
You can find the links to download Ultimaker Cura 3.4 here:
You should also watch our guides to download different very powerful 3d modelling software for free: